Mrs. Jackson Cooks

Life through food

Quick, easy, healthy pie: Pork and potato pie

IMG_5631.JPG

I bet you didn’t think that pies could be either quick, simple or healthy.  This one doesn’t use pastry so that does help on all those fronts.  This one uses cubed pork in a tomatoey sauce topped with sliced potatoes.  Great for dinner during the week.  Just throw together and shove in the oven.

I did have a recipe for this, but I can’t seem to find it now.  I was sure it was a reader recipe on BBC good food, but maybe I was wrong. However, it’s really simple so I should be able to do it from memory.


IMG_5632.JPG

Pork and potato pie

Serves 2

  • 3 medium potatoes, peeled and sliced
  • 2 tsp oil
  • 250g boneless pork, cubed
  • 1 tbsp plain flour
  • 1 onion, finely chopped
  • 2 garlic cloves, peeled and crushed
  • 3 sprigs of rosemary, finely chopped
  • 1 pepper chopped into squares, or carrots chopped and/or celery, or mushrooms sliced (whatever you have)
  • 1 tin tomatoes
  • 200ml beef or chicken stock
  • 1 tsp worcester sauce
  • salt and pepper to taste
  1. Preheat the oven to about 190 degrees celsius
  2. Boil the potatoes until cooked but still firm in boiling water (about 10 minutes).  Drain and rinse under cold water
  3. Meanwhile heat the oil in a pan.
  4. Toss the pork in the flour and shake off the excess.
  5. Fry the pork in the oil until browned on all sides.
  6. Add the onion and garlic, turning down the heat and cook until the onion is softented.
  7. Add the rosemary and whatever vege you’re using and cook for a further couple of minutes.
  8. Add in the tomatoes and stock, and bring to the boil.
  9. Then simmer until you have a good saucey consistency.
  10. Add in the worcester sauce and then salt and pepper to taste.
  11. Tip the pork sauce into a baking dish and layer the potatoes on top
  12. Cook in the oven for about 20-25 minutes until the potatoes are golden (or you can do under the grill, it’s quicker.  Until they’re browned, but I think the oven makes them taste nicer)
  13. Serve and enjoy 🙂


Leave a comment »

Totally delicious low calorie flapjacks

20130422-034850 PM.jpg

Having put on quite a bit of weight over the past few months due to my life being a bit chaotic and unpredictable, I’ve decided to try and be healthier and lose a few pounds.

But I need to wean myself off the sugar and carbs slowly as I’m not up for shock tactics. So I thought if I could make flapjacks that are low in refined things and sugar and high in energy boosting things then it would be a good start to cutting down.

I found this recipe here http://cakeincardiff.wordpress.com/2012/10/29/low-calorie-flapjacks/ I’ve heard lots about the hairy bikers diet book – think I’m going to have to get sometime. I do like the Hairy Bikers, their recipes are very doable.

I made 16 flapjacks and adapted the recipe slightly. I worked out that each square has 88 calories so it’s a great diet snack as it’s under the 100 calorie mark, high in fibre and energy boosting oats, low in sugar, got a bit of fruit in it and even some nuts for protein.

And I’ve tried them – they’re delicious, so easy to make – I put it all together in about 5 mins and then shoved it in the oven until cooked. Requires virtually no equipment and you can adapt it anyway you like – use honey instead of maple syrup, substitute some oats for rice crispies, put in any dried fruit and nuts that you like, use any juice you want…and the bonus is – no sweetener in sight – this doesn’t feel like a diet snack. On top of that – these are really purse friendly. Even if you don’t have the ingredients in stock, they’re not expensive to buy – all these ingredients are in most supermarkets’ value ranges – just adapt to whatever you can find.

Cranberry & hazelnut flapjacks

16 squares

  • 200g rolled (porridge) oats
  • 300ml orange or apple juice
  • 2 tbsp maple syrup, honey or golden syrup
  • 60g dried cranberries (or apricots, dates, mixed peel – any dried fruit)
  • 60g raisins (sultanas, currants, whatever)
  • 30g hazelnuts, toasted and chopped (or any nuts)
  1. Preheat the oven to 180 degrees celsius
  2. Put the juice and syrup in a pan and heat until it starts to simmer.
  3. Add in the oats and mix well until completely combined (there shouldn’t be juice left it should be absorbed)
  4. Take off the heat and add in the fruit and nuts.
  5. Mix well to combine then turn into a greased baking tray. Push it all out until it fills the corners of the tray and then push down hard so its very compacted (fingers are good for this).
  6. Bake in the oven for about 40 minutes or until golden and crispy on top.
  7. Remove from the oven, cut into squares whilst still warm (I used a pizza roller thingy but I knife will do). Leave to cool in the tin.
  8. Turn out and enjoy the fruity chewiness without feeling guilty 🙂
1 Comment »

Moussaka

20130420-122411 PM.jpg

As I’m writing this, I’m making a cake for a good friend’s birthday. I’m having problems with the biscuit layers and just hoping that a bit longer in the freezer will sort them out! I’ll be posting that recipe on here too, have no fear – there is so much sugar and chocolate in it, whatever happens it will definitely taste good (I’ve tried the mixture – just to be sure I don’t kill anyone!).

But Moussaka – the reason for this post and not tomorrow’s one. I love this. It’s delicious, healthy, super simple to make, can be made in batches and eaten for the rest of the week or makes a great casual dinner that looks great, tastes great and doesn’t have you tied to the kitchen all night.

There’s no carbs in this so it’s perfect for those of you on low carb diets or no carbs in the evening diets. It’s low fat and lean proteins too. It has 513 calories per serving in it, so it makes a great dinner meal.

I got this from my Greek recipe book, which you can find here http://www.amazon.co.uk/Perfect-Padded-Cookbooks-Greek-Love/dp/1445422387/ref=sr_1_1?ie=UTF8&qid=1366456152&sr=8-1&keywords=love+food+greek+cookbook

If you’re veggie you can easily substitute the mince for quorn or lentils, or if you’re wanting a more economical moussaka, or a change from the norm, you can do half mince and half lentils.

Moussaka

Serves 4

  • 1 tsp oil
  • 2 onions, finely sliced
  • 3 garlic cloves, minced
  • 400g tin of tomatoes (chopped or plum)
  • 2 tbsp chopped fresh parsley
  • salt & pepper
  • 2 eggs
  • 300ml low fat natural yoghurt
  • 1 tbsp grated parmesan
  1. Preheat the oven to 180 degrees celsius
  2. Thinly slice the aubergines and dry fry in a large pan on a high heat until browned on both sides. Spread them out in the pan – you may need to do this in batches. Set aside.
  3. Heat the oil in the frying pan and on a medium heat, fry the onions and garlic together until softened but not browned.
  4. Add in the mince, turning up the heat and browning it, breaking it up with the spatula.
  5. Add in the tomatoes, and season to taste. Bring to the boil and then simmer gently for about 20 minutes.
  6. Whisk together the eggs and yoghurt, with some seasoning.
  7. When the mince is cooked through stir through the parsley
  8. Place half of aubergine slices in the bottom of a baking dish in a single layer.
  9. Pile the mince mixture on top and then layer the remaining aubergine on top to cover it.
  10. Pour over the egg mixture covering the aubergine and sprinkle the parmesan on top.
  11. Cook in the oven for about 20-30 minutes until cooked through and golden on top.
  12. Serve immediately and enjoy memories of your holidays.
1 Comment »

Lamb stew with garlic bread crust

20130416-112957 AM.jpg

I found this in my cook in boots cookbook by Ravinder Bhogal. I had previously ignored it because of the garlic bread crust and I wasn’t eating bread. However, my problems with yeast and bread seemed to have cleared up so I’m eating it again, and so glad to be able to eat anything again.

This was delicious, healthy, hearty and very simple to make. It does need a couple of hours so it’s probably not a midweek thing, although you could make the stew the day before and just finish off in the oven on the day.

It has 560 calories per serving, depending on how much you want. The recipe says 6 servings, however, I don’t know if it was because we were hungry (we hadn’t eaten much all day) or we’re just greedy pigs, but we ate most of it and there’s probably only enough for 1-2 more portions so for 3-4 people. The calories are based on it being for 3 people.

Even so, even if you’re watching the calories, this is a good one. Lots of protein, some comfort carbs, plenty of vege and no extra sneaky things to up the calories for no reason. You could just make the stew and serve with potatoes or have a mashed potato crust instead if you prefer.

It’s also very cheap and the stew itself is freezable, so it’s a great family friendly meal.

Lamb stew with garlic bread crust

Serves 4

  • 500g diced stewing lamb
  • 1 tbsp plain flour
  • 2 tsp oil
  • 1 leek, cut into thick rounds
  • 3 celery sticks, cut into chunks
  • 1 turnip, cut into 8ths
  • 1 large chilli, cut into rounds
  • 100g pearl barley
  • 500ml chicken or lamb stock (plus extra water)
  • 2 sprigs fresh rosemary or 1 tsp dried
  • 2 bay leaves
  • 1 garlic bread baguette (or make your own)
  1. Heat 1 tsp of oil in a casserole dish (that’s flameproof, or use a saucepan)
  2. Toss the lamb in the flour and discard the excess flour.
  3. Fry the lamb in the oil on a high heat until browned on all sides. Remove with a slotted spoon and set aside.
  4. Turn the heat down to medium, add the remaining oil if needed and fry the leek, turnip and celery until softened and starting to brown – about 10 minutes.
  5. Return the lamb to the pan along with the pearl barley, bay leaves, rosemary and chicken stock.
  6. Stir well, bring to the boil and then simmer gently, covered, for about 1 hour, or until the lamb is tender. Check occasionally and top up with water as needed.
  7. About 15 minutes before the stew is cooked, preheat the oven to 180 degrees celsius.
  8. Prepare the garlic bread baguette.
  9. When the stew is cooked, top with sliced garlic bread baguette to form a crust and bake in the oven for about 20 minutes or until the bread is cooked and crispy.
  10. Serve immediately and enjoy 🙂
Leave a comment »

The cake and bake show: chocolate & banana tarte tatin

20130416-110527 AM.jpg

Last weekend I went to the cake and bake show with a good friend of mine. I wasn’t really sure what to expect but had so much fun, and bought loads of edible goodies.

I also watched a demonstration by Eric Lanlard, Patissier living in London. He’d just brought out a new book all about chocolate and I was really impressed by how simple his recipes were despite looking like something much more complex. So I bought his new book and to my delight, he had tarte tatin in his book.

You know how much I love tarte tatin, plus I had old bananas that Mr J had brought home from work (I am the banana dustbin for his work it seems), so it seemed like the perfect inspiration.

The book isn’t available to buy yet, although it will be in a week or two. Called Chocolat by Eric Lanlard – pic below.

Here is my version of his tarte tatin from the book, and very yummy it was too. If you’re craving chocolate, need a hangover cure, need some comforting or even a fantastic dinner party dessert – this is the one for you. It’s not for diets though! But you can’t diet forever.

Chocolate & Banana Tarte Tatin

Serves 4-6

  • 100g light brown sugar (you can use other sugar, it’ll just taste a bit different – this is quite treacle-fudgy)
  • 50g unsalted butter
  • 75g dark chocolate, chopped
  • 2 cinnamon sticks (or use 1 tsp ground cinnamon but it’s less decorative)
  • 4-5 bananas, sliced on the diagonal
  • 350g ready made puff pastry (I used ready rolled too to make it even easier)
  1. Preheat the oven to 200 degrees celsius
  2. Roll out and cut the pastry to about 1 inch larger than a heavy flat bottomed frying pan
  3. Put the sugar in the frying pan with about 4 tbsp of water and gently heat, stirring constantly, until you have a dark orangey colour. Remove from the heat and keep stirring until it stops changing colour.
  4. Add the butter and chocolate and stir until melted. Then drop in the cinnamon.
  5. Arrange the bananas in the caramel sauce in circular patterns (this will be the top of your dessert)
  6. Cover with the pastry so that the pastry hangs over the sides of the pan and then tuck in all the edges.
  7. Pierce the top of the pastry to allow steam to escape and place in the oven for about 20-25 minutes or until the pastry is puffed and golden.
  8. Remove from the oven, leave to cool for a few minutes. Then place a plate on top of the pastry and invert the pudding onto it.
  9. Serve immediately with custard, whipped cream or icecream.
  10. Enjoy 🙂

20130416-110534 AM.jpg

Leave a comment »

92 calorie individual apple pies

20120923-041707 PM.jpg

Since getting back from Ibiza I’ve really been trying to be good and get back into being healthy. The problem is, I’ve been depressed and craving sugar, and so I’ve ended up in front of the vending machine far too many times. In an attempt to rectify that, whilst not going totally cold turkey I found these fantastic pies.

They fill the craving hole whilst not ruining your good intentions and they are delicious, and super simple to make. You literally need an oven and that’s about it.

Our neighbour has an apple tree and many of his apples have ended up in our garden, some a bit worse for wear but still edible. So I thought it better to cook them down with a bit of sugar (I actually used sweetener, you can’t taste the difference). Then I added some strawberries that were very cheap in the supermarket but also a bit worse for wear and needed cooking. Both the apples and strawberries were very sweet so didn’t need much sweetener, just a bit to bring out the juices. I added a squeeze of lemon too.

And filo pastry is the best for pastry if you’re watching your weight, it’s a lot lighter than other pastries. I used olive oil spray instead of melted butter between the sheets. I honestly couldn’t tell any difference.

I made about 15 triangles. They’ll easily keep in a box for a few days and are great for taking to work for lunch or a snack.

Apple and strawberry pies

Makes about 15

  • 5-6 eating apples or 2 baking apples, cored and chopped
  • 125g strawberries, hulled and halved (or use strawberry jam)
  • 2 tbsp splenda or other sweetener
  • 4 sheets filo pastry
  • oil spray
  • 1 egg beaten
  1. Heat the oven to 200 degrees celsius
  2. Place the apple and strawberries with the sweetener in a saucepan on a medium heat, stiring occassionally until they break down and release their juices. Add a bit of water if its too dry. This takes about 10-15 minutes. Remove from the heat and allow to cool.
  3. Carefully remove the filo pastry sheets from the package onto a clean, dry surface, one at a time. Spray the top of each one with 3-4 sprays of oil spray before placing the next sheet on top of it. Spray the top of the 4th sheet.
  4. Cut into thirds, lengthwise.
  5. Place a tablespoon of the apple and strawberry mix in the middle of the top third of pastry, towards the left end. Fold the corner of the pastry diagonally across to make a triangle and cover the mix. Cut along the edge which meets the pastry and press along the edges to seal. Place on a baking tray sprayed with oil spray. Brush with the beaten egg, pressing down the edges as you go. Repeat until all the pastry and mixture is used up.
  6. Bake for about 20 minutes until cooked through and golden on top.
  7. Remove from the oven, allow to cool, and then eat with a nice cup of tea, feeling your cravings subside.
Leave a comment »

Cheap and healthy meals: lentil and mince enchiladas

20120714-081024 PM.jpg

I do like enchiladas and they’re pretty healthy any way you do them, but I also love lentils, so the opportunity to add them to enchiladas couldn’t really be missed (I have made them the standard chicken or beef strips instead in the past). Lentils give you lots of great protein without the calories and make mince beef go further – which is why its cheap, because lentils cost virtually nothing.

I found the original recipe here, but more or less just made this up as I went along. And they were delicious. I think you can add more or less whatever you like to this recipe. Make it with just mince (combine the lentil and mince quantities), add peppers, add tomatoes, add whatever you like, or leave it all out. Use tinned tomatoes instead of passata – but add tomato puree too. Whatever. You can use flour or corn tortillas too. Get creative!

My recipe is 612 calories for 2 tortillas is 612 calories. So it’s still not super low in calories but is fine for dinner if you’ve been good in the day.

http://thirty-quid.blogspot.co.uk/2010/07/beef-and-lentil-enchiladas.html

Lentil and mince enchiladas

Serves 2

  • 50g lentils (I used red as these cook fastest)
  • 1 tbsp oil
  • 1 onion
  • 150g beef mince (I used lean steak)
  • 1/2 tin sweetcorn
  • 200ml passata
  • 75ml beef stock
  • 2 tbsp fajita seasoning (or make your own)
  • 1 tbsp chopped jalapenos (or use fresh chillis instead)
  • 2 tomatoes, chopped
  • salt & pepper
  • 4-5 tortillas (I used corn)
  • 4 tbsp herby soured cream
  • 50g cheddar cheese, grated
  1. Preheat the oven to 200 degrees celsius.
  2. Boil the lentils in water until soft and mushy. Drain and set aside.
  3. Meanwhile, heat the oil in a pan and add the onion. Cook on a medium heat until translucent but not browned.
  4. Add the mince, turning up the heat and frying until browned, breaking lumps up with the spatula.
  5. Add in the jalapenos, sweetcorn, fajita seasoning and tomatoes. Cook out for a couple of minutes.
  6. In a bowl combine the passata and beef stock.
  7. Add 2/3 of the passata mix to the pan, mixing well.
  8. Add in the lentils and 1/3 of the cheese and give it another stir.
  9. Remove from the heat. Take a tortilla and fill the middle with the mix (I find a couple of spoonfuls usually does it).
  10. Roll and place with seam downwards in a rectangular baking tray or dish. Repeat until all the tortillas are filled.
  11. Pour the rest of the passata mix over the rolled tortillas and then dollop the soured cream over. Sprinkle with the remaining cheese.
  12. Place in the oven for about 20 minutes until cooked through and the cheese is melted and golden.
  13. Carefully remove from the pan with a spatula and serve (with a green salad perhaps?)
  14. Enjoy 🙂
Leave a comment »

Easy peasy banana cake

20120508-121347 PM.jpg

Hubby brought home a load of over ripe bananas from work last week, and so I made banana cake. I have such a simple and quick recipe that I use and the end result is always delicious. It’s moist and sticky and very bananary!

The main thing to this recipe is a food processor or blender or smoothie maker – basic an electric thing that wizzes. Even a hand blender would work. This is what makes it simple. Otherwise you’re back to the old fashioned way of creaming butter and adding eggs and hoping they don’t curdle. Basically, weigh everything out (I did this in one bowl, putting everything on top of each other), bung it in a blender or processor, wizz til smooth. Then put in a cake tin and cook til risen, golden and fluffy. And ta da- you are a wonderful cake god(dess)! The prep stage takes about 10 minutes tops. And then you can set the timer on your oven and leave it until it beeps.

With this recipe, the more overripe the bananas are, the better, and the less sugar you need to add.

I’ve no idea where the recipe came from – I’ve had it written in the back of a recipe book for years! And had previously been on a post-it note. It might have even come from my mum or a friend’s mum.

Banana cake

makes 2 loaf cakes (about 10 – 12 slices)

  • 250g self-raising flour (or use plain flour with 1.5 tsp baking powder and a pinch of salt)
  • 340g caster sugar
  • 4 bananas, mashed
  • 340g butter or margerine, softened
  • 6 eggs
  • 2 tbsp vanilla essence
  • To ice:
  • 3 tbsp lemon juice
  • 1-2 tbsp granulated sugar
  1. Preheat the oven to 180 degrees celsius. Grease 2 loaf tins.
  2. Place ingredients in a food processes or and blend til smooth.
  3. Pour half the mixture into each tin and bake for 45-50 minutes in the middle of the oven, or until a knife comes out the middle of it clean.
  4. Allow to cool slightly in the tins for about 10 minutes, then turn onto wire racks to cool.
  5. Meanwhile, making the sugar glaze icing by dissolving the sugar in the lemon juice. Prick the top of the cake all over with little holes (I use bbq skewers) and pour the glaze over it. It will run everywhere (make sure you do on a plate or cover the surface) but don’t worry, it’ll set and look quite pretty.
  6. Cool and serve with a nice cup of tea. And enjoy 🙂
Leave a comment »

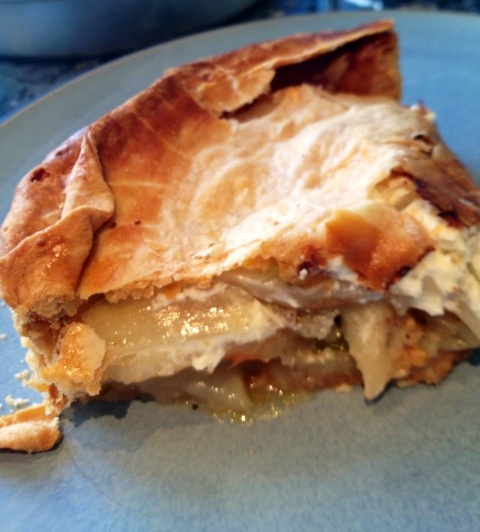
Pie attempts: Cheese and onion pie

20120424-021328 PM.jpg

I decided to brave it and try a pie again. Not making pastry from scratch – that came out the freezer – baby steps! But actually making a pie and trying to not either have it come out burnt or soggy, or even both.

Turns out one of Mr J’s favourite foods is cheese and onion pie. You think you know someone, and then they go and tell you a thing like that after 11 years – you wonder why they’ve been hanging onto that piece of information for so long! And here I was thinking profiteroles or steak or a cheeseboard were his favourite things!

I found a recipe for cheese and onion pie that didn’t seem too difficult. And thought I’d try it. Then I spoke to my mother in law who told me to blind bake it first and wash it in egg glaze. And to use a metallic cake tin (as I don’t have a pie dish). This proved good advice but did turn the recipe from something that seemed simple to something that wasn’t.

This is not for those of you who are allergic to cooking or not confident about what you’re doing. It’s also not good for small kitchens (I managed to get pastry all over mine, and cover every surface in things, and it’s a good size these days!) Buy it in Greggs instead. It is, however, perfect for the confident vegetarian. Or those adept at pies. Or the foolish (like me).

The original recipe is here http://www.bbcgoodfood.com/recipes/9650/deepdish-cheese-onion-and-potato-pie

And here is my version including my mother in law’s advice (which I definitely recommend if you’re avoiding burning and sogginess).

Cheese and onion pie

Serves 6-8

  • 1 packet ready made shortcrust pastry (defrost if frozen first)
  • 1 egg, beaten
  • 4-5 medium potatoes, peeled and finely sliced
  • 2 onions, finely sliced
  • bunch of spring onions, roughly chopped
  • 200g strong cheddar, grated
  • 200g creme fraiche
  • grated nutmeg
  • paprika
  • salt & pepper
  1. Pre heat the oven to 200 degrees celsius
  2. Grease and flour a large cake sponge tin or pie dish (about 20-23cm)
  3. Flour a dry clean surface. Roll out your pastry until quite thin (but not so it’s breaking).
  4. Place 2/3 of it in the tin, so that there’s enough overhang (but not too much) and gently push into the edges of the tin. Blind bake (I scrunch up greaseproof paper and then smooth out and place on top of the pastry (including overhang) and then fill with rice – you can still cook toasted rice) for 15 minutes.
  5. Remove from the oven. Remove the rice and paper and egg wash the pastry. Cover the overhang pastry with greaseproof paper again (but not the rest) and bake for a further 5 minutes. It should be pale but firm and crispy.
  6. Remove from the oven and allow to cool for a few minute.
  7. Add a layer of sliced potatoes to the bottom of the pie, followed by a sprinkling of onions & spring onions and cheese. Shake over a bit of nutmeg and paprika and some salt & pepper. Repeat with another layer, this time putting half the creme fraiche on the top. Then another layer of potatoes, onions, cheese until it’s used up (it will come above the pastry). Gently push the layers down a bit. Then dollop on the remaining creme fraiche.
  8. Roll out the remaining pastry a bit thinner than the bottom pastry until it will cover the pie. Brush the underneath pastry overhang with egg then place the pastry on top, washing all over with egg and pressing it hard to the bottom overhang pastry.
  9. Make 2 small slits in the top of the pastry to allow air to come out.
  10. Bake in the oven for 30 minutes, then turn down the oven to 170 degrees celsius and cook for a further 30 minutes.
  11. Remove. Allow to cool for 1o minutes then serve with a nice green salad.
  12. Enjoy!

20120424-021321 PM.jpg

Leave a comment »

Vege dinner party option: mushroom and blue cheese tart

20120416-123744 PM.jpg

This is a super simple, very delicious and fancy looking dinner party main for the vegetarians in your life, or perhaps if you just fancy doing something vege. It’s delicious. I actually did it for dinner one Wednesday! If you have pastry in your freezer it couldn’t be simpler. But it’s great if you have veges coming for dinner and aren’t sure what to do. If you left out the cheese you could even satisfy vegans (I think! Just make sure the pastry isn’t made with butter).

The original is from the BBC Good food website (where else?!) http://www.bbcgoodfood.com/recipes/333631/onion-walnut-and-mushroom-tarte-tatin and I didn’t change it that much really. Perfect way to use up the bit of blue stilton left over from Christmas slowly getting more and more ‘fragrant’!

Mushroom and blue cheese tart

Serves 4-6 (depending on if its starter or main)

  • 4 onions, cut into wedges
  • 2 tbsp olive oil
  • 200g mushrooms , halved (chestnut ones are good if you have them)
  • 2 tsp light brown sugar
  • 50g walnuts, roughly chopped
  • 100g blue cheese (eg Stilton)
  • 1 pack puff pastry, defrost if frozen
  1. Heat the oven to 200 degrees celsius.
  2. Select a medium sized low sided frying pan. Roll out the pastry and cut a circle just wider than the pan (easiest done if you put the pastry on a floured surface and place the pan upside down on the pastry – then just cut around it leaving a 5cm lip)
  3. Heat the oil in the pan and add the onion wedges. Cook over a low heat until lightly coloured.
  4. Add mushrooms, sugar and salt & pepper to taste. Cook for 5 minutes or until the mushrooms are softened, stirring well.
  5. Stir through the walnuts and cook for a couple of minutes. Then remove from the heat and crumble over the cheese.
  6. Place the pastry over the top of the pan, tucking in the overhanging bit.
  7. Place in the oven for 20-30 minutes, or until the pastry is puffed and golden.
  8. Remove from the oven and allow to sit for 5 minutes.
  9. Then place a large plate on top of the pastry and invert the tart, tipping it onto the plate, pastry side underneath.
  10. Serve with a green salad and enjoy immediately!

20120416-123755 PM.jpg

Leave a comment »