Mrs. Jackson Cooks

Life through food

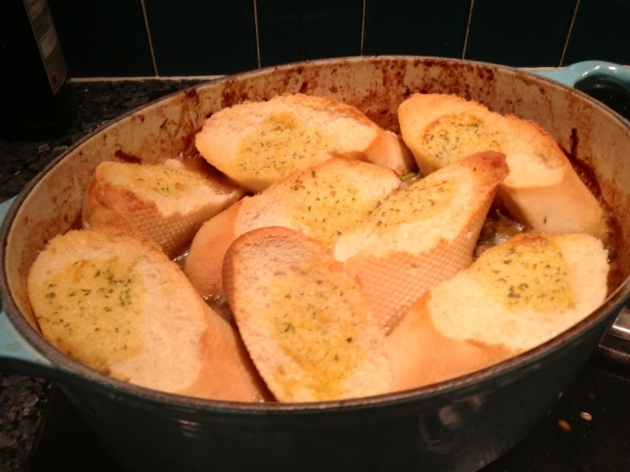
Lamb stew with garlic bread crust

20130416-112957 AM.jpg

I found this in my cook in boots cookbook by Ravinder Bhogal. I had previously ignored it because of the garlic bread crust and I wasn’t eating bread. However, my problems with yeast and bread seemed to have cleared up so I’m eating it again, and so glad to be able to eat anything again.

This was delicious, healthy, hearty and very simple to make. It does need a couple of hours so it’s probably not a midweek thing, although you could make the stew the day before and just finish off in the oven on the day.

It has 560 calories per serving, depending on how much you want. The recipe says 6 servings, however, I don’t know if it was because we were hungry (we hadn’t eaten much all day) or we’re just greedy pigs, but we ate most of it and there’s probably only enough for 1-2 more portions so for 3-4 people. The calories are based on it being for 3 people.

Even so, even if you’re watching the calories, this is a good one. Lots of protein, some comfort carbs, plenty of vege and no extra sneaky things to up the calories for no reason. You could just make the stew and serve with potatoes or have a mashed potato crust instead if you prefer.

It’s also very cheap and the stew itself is freezable, so it’s a great family friendly meal.

Lamb stew with garlic bread crust

Serves 4

  • 500g diced stewing lamb
  • 1 tbsp plain flour
  • 2 tsp oil
  • 1 leek, cut into thick rounds
  • 3 celery sticks, cut into chunks
  • 1 turnip, cut into 8ths
  • 1 large chilli, cut into rounds
  • 100g pearl barley
  • 500ml chicken or lamb stock (plus extra water)
  • 2 sprigs fresh rosemary or 1 tsp dried
  • 2 bay leaves
  • 1 garlic bread baguette (or make your own)
  1. Heat 1 tsp of oil in a casserole dish (that’s flameproof, or use a saucepan)
  2. Toss the lamb in the flour and discard the excess flour.
  3. Fry the lamb in the oil on a high heat until browned on all sides. Remove with a slotted spoon and set aside.
  4. Turn the heat down to medium, add the remaining oil if needed and fry the leek, turnip and celery until softened and starting to brown – about 10 minutes.
  5. Return the lamb to the pan along with the pearl barley, bay leaves, rosemary and chicken stock.
  6. Stir well, bring to the boil and then simmer gently, covered, for about 1 hour, or until the lamb is tender. Check occasionally and top up with water as needed.
  7. About 15 minutes before the stew is cooked, preheat the oven to 180 degrees celsius.
  8. Prepare the garlic bread baguette.
  9. When the stew is cooked, top with sliced garlic bread baguette to form a crust and bake in the oven for about 20 minutes or until the bread is cooked and crispy.
  10. Serve immediately and enjoy 🙂
Leave a comment »

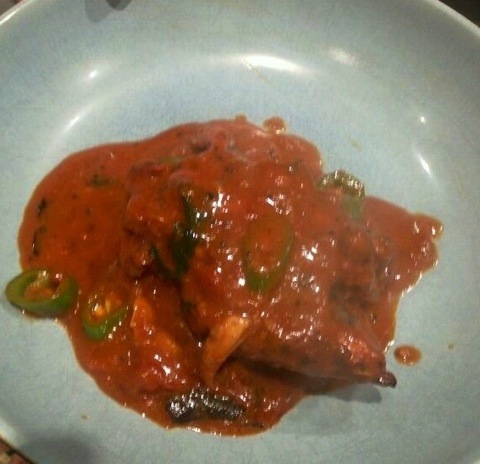
Tamarind and lime chicken curry

20120508-115616 AM.jpg

As you know, I love tamarind. So when I found this recipe for tamarind and lime curry, I had to try it. There was a distinct lack of chilli in it though, so I added some quite generously! And it was absolutely delicious – let the sauce simmer and thicken for quite a while – it’s just delicious and perfect for dipping naan bread in. Plus the longer you cook the chicken the more it just falls off the bone. It’s still very doable as a midweek meal though – I think it would take 40-45 minutes.

This curry doesn’t have much vege (and you know how I love to have vege in everything) so we had a potato and aubergine takari side dish, which was also very delicious and I’ll blog about in a later post. It went with the curry very well. We didn’t bother with rice, we just had some naan with it (which we didn’t really eat much of either – the potatoes being filling enough).

The original recipe is here http://www.bbcgoodfood.com/recipes/1852638/coconut-and-tamarind-chicken-curry

I did vary it somewhat. I didn’t bother to bake it, I just did it all on the hob and bunged the chicken in the sauce to cook. I also didn’t bother with coconut cream – and it really didn’t need it. And I used low fat coconut milk to reduce the calories.

It’s actually a pretty healthy option – the original recipe is 466 calories a serving, without the cream and with reduced fat coconut milk – it’s going to be less – perhaps nearer to 400 calories. With the takari and naan – you’re looking at 6-700 calories max.

You could also replace the chicken with a firm white fish for a fish curry version, or add veges to keep it vegetarian and vegan friendly – or for a lower fat option.

Tamarind and lime chicken curry

Serves 3-4

  • 6-8 skinned chicken leg pieces (thighs and drumsticks) on the bone
  • Juice and zest of 2 limes
  • 2 small green chillis, finely chopped
  • salt & pepper
  • 2 tbsp oil (I used peanut, but sunflower, vegetable etc is also good – not olive or sesame)
  • 1.5 tsp mustard seeds
  • small handful of curry leaves
  • 2 medium onions, finely chopped
  • 3 garlic cloves, crushed
  • small piece of ginger, peeled and grated
  • 2 tsp paprika
  • 2 tsp chilli powder
  • 1 can tomatoes plus 200ml passata or 2 cans tomatoes and 1 tbsp tomato puree
  • 1 can reduced fat coconut milk
  • 200 ml chicken stock
  • 1 tbsp brown sugar
  • 2 tbsp tamarind pulp
  • 1 tbsp chopped fresh coriander
  • 2 large green chillis, sliced
  1. Put the chicken in a dish enough for it to spread out. Add the lime juice and zest, small green chillis, salt & pepper. Mix well to coat and set aside until needed.
  2. Heat 1 tbsp oil in a large saucepan or flameproof casserole dish (that has a lid). Add the mustard seeds & curry leaves until they start to pop. Then reduce the heat, add the onions and cover. Allow to cook slowly for about 10 minutes, until softened and browned, stirring occasionally.
  3. Whilst the onions are browning, heat the remaining oil in a frying pan. Remove the chicken from the marinade and fry on either side until browned. You may need to do this in batches. Set aside.
  4. Add the garlic and ginger to the onions and turn up the heat again. Cook for about 30 seconds before adding the paprika and chilli powder. Stir well.
  5. Then add the tomatoes and passata or puree, chicken stock and sugar and place the chicken in the pot, covering them with the liquid. Cook on a low heat, covered for about 10-15 minutes.
  6. Then remove the lid and turn up the heat, until the sauce is thickened and reduced.
  7. Then stir through the coconut milk and tamarind. Simmer for a further 5 minutes or until the sauce is a nice deep red in colour and thick.
  8. Add the coriander and chilli slices, stir again and serve immediately with naan or rice.
  9. Enjoy the delicious tart and sweet flavours 🙂
Leave a comment »

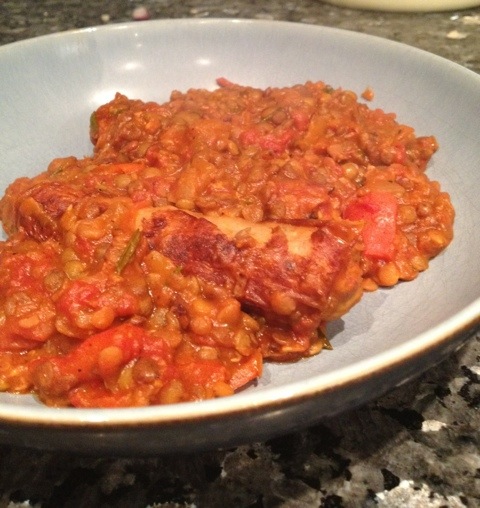
One pot wonder: sausage and lentil hot pot

20111116-015326 PM.jpg

Hubby had had a bad day at work, and it must be my cooking – but I seem to have convinced him that lentils are comfort food! They are, of course, and as you know, I absolutely love them, but hubby had a different idea of comfort – stews mostly, and pizza of course. His pizza obsession is unwavering, but he specifically requested lentils last night, so I made a delicious tomatoey hotpot with sausages and lentils.

The recipe came from BBC Good food, here http://www.bbcgoodfood.com/recipes/1708/lincolnshire-sausage-and-lentil-simmer and I followed it more or less exactly, except I didn’t have any bacon so I left that out, I used cumberland sausages instead of lincolnshire ones and I used bog standard green lentils instead of puy. It still tasted amazing. In fact, leaving out the bacon would have reduced the calories, making it another good, tasty diet option for that Christmas diet.

I’d say, you’re fairly safe using any kind of lentil and any kind of sausage. The flavours in this are so strong that best quality stuff is not necessary – so it’s also a good storecupboard, when you’re skint, or can’t be bothered to shop, option. Providing your kids will eat lentils – I’d say this is a good kiddie option too as although there’s strong flavours – the tomatoes are mushed up and it’s not spicy, just tasty.

The other great thing about this, is it uses just one pot, so it’s very washing up-light too – perfect for the midweek – and it’ll be ready within 40-50 minutes including prep.

Sausage and lentil hot pot

Serves 2

  • 1 tbsp oil (any kind)
  • 4 medium sized sausages of your choice
  • 1 medium onion, roughly chopped
  • 1 garlic clove, finely chopped
  • 1 pepper, roughly chopped, or a carrot or whatever’s lurking in the fridge
  • 100g lentils of your choice
  • 2 sprigs of rosemary, leaves removed and chopped
  • 1 tin of tomatoes (chopped, plum, whatever)
  • 250ml chicken stock (or vegetable)
  • salt and pepper
  • handful of chopped fresh parsley
  1. Heat the oil in a flameproof casserole dish or large saucepan. Add the sausages and fry on all sides until browned. Remove from the pan and drain on kitchen towel.
  2. Add the onion and garlic to the pan and fry until the onion starts to brown. Then add the pepper or other veges and fry for a few minutes.
  3. Next add the lentils, rosemary, tomatoes and stock. Return the sausages to the pan. Bring to the boil and simmer hard for 5 minutes.
  4. Then reduce the heat to low, cover and simmer gently for about 20-30 minutes or until the lentils are cooked. Add more water if it’s needed, or if you have extra, turn up the heat and boil it off once the lentils are cooked – making sure you stir frequently to avoid it sticking.
  5. Add the parsley and season to taste. Stir well to combine and serve immediately with a hunk of crusty bread
  6. Enjoy the comforting goodness 🙂
Leave a comment »

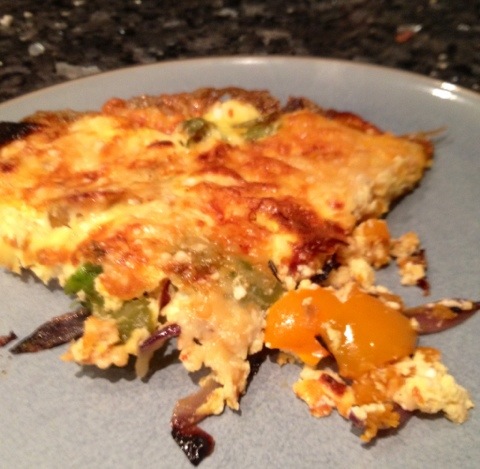
A winter vege delight: sweet potato and goat’s cheese tortilla

20111111-043000 PM.jpg

I’ve been feeling “meated” out recently and have been going vege (and fish as well) in an attempt to get my dietary balance back. I was looking for vege options on a website, and came across this recipe. The one they use they suggest it’s a vege centrepiece at Christmas, but I adapted it somewhat so it’s less rich and quicker to cook and is better for a midweek option.

It doesn’t take long to do at all. You just whack the veges in the oven, leave them for 30 minutes (I had a shower whilst they were doing) and then come back and finish off the tortilla which takes about 5-10 minutes tops. So it’s a very good midweek healthier option, or just something different for you veges out there. It’s delicious too and very easy to eat – so good if you’re feeling a little over indulged or coming down with something.

The original recipe is here, and I’ve no doubt will be wonderful for veges at Christmas http://www.allaboutyou.com/food/recipefinder/sweet-potato-goats-cheese-tortilla-recipe-8000?click=recipe_sr

Sweet potato and goat’s cheese tortilla

Serves 2-4 (depending on what you serve with it and if it’s a main course)

  • 1 large sweet potato, peeled and thinly sliced
  • 1 small red onion, finely sliced
  • 2 peppers of different colours, roughly chopped
  • 2 tbsp olive oil
  • salt and pepper
  • 4-5 mushrooms, sliced
  • handful of basil leaves, chopped or torn (or use spinach as the recipe suggests)
  • 4 eggs
  • 2 tbsp creme fraiche
  • 50g soft goats cheese, chopped
  • 20g parmesan cheese, grated
  1. Preheat the oven to 230 degrees celsius.
  2. Put the potato and veges in a large roasting tray. Drizzle over half the olive oil and season well. Stick in the oven for about 30 minutes, or until roasted through.
  3. Remove from the oven and set aside. Preheat the grill on high.
  4. Whisk the eggs, creme fraiche and goats cheese together with plenty of pepper
  5. Heat the remaining oil in a large shallow frying pan.
  6. Fry the mushrooms in the oil until their juices run and they turn brown.
  7. Add the roasted veges to the mushrooms and mix well to ensure the potatoes get on the bottom and the mushrooms are on top – and mixed into the rest of the vege. Make sure the vege cover the whole of the bottom of the pan.
  8. Sprinkle over the basil.
  9. then tip the egg mix all over and spread around evenly.
  10. Cook until the bottom is done and the top has started to set.
  11. Sprinkle over the parmesan and put under the grill until the top is cooked and the cheese browned.
  12. Serve immediately, on it’s own, or with vege on the side.
  13. Enjoy!
Leave a comment »

Fakeaway no. 2: MJFC (Mrs Jackson’s Fried Chicken)

20111108-042453 PM.jpg

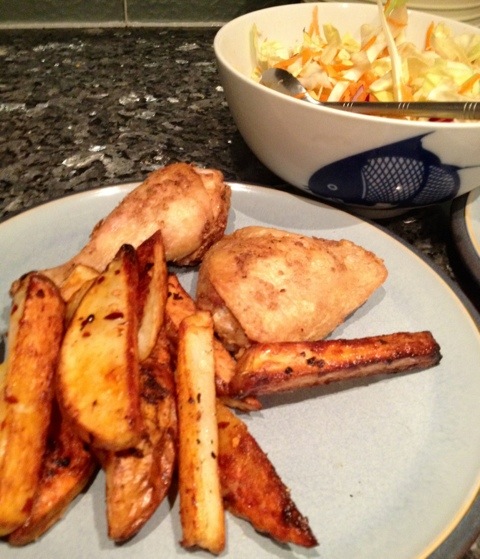
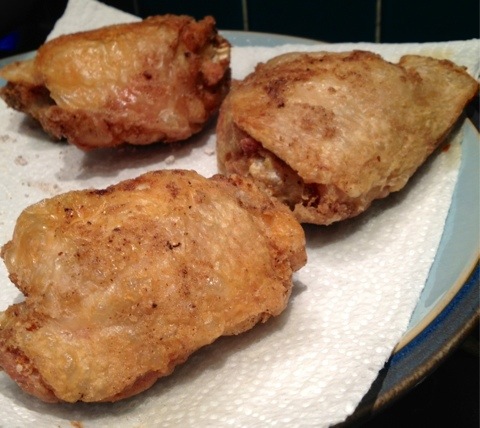
I know, I realise, MJFC does sound like a football club. I assure you its not. Infinitely tastier, for starters, and generally not full of football fans (although it may fill football fans). It’s my (or rather, Ravinder Bhogal’s) version of KFC. And I must say I’m pretty pleased with it. When I eat this, I wouldn’t rather have KFC at all. Ever!

I serve with spicy wedges (recipe you can find here https://mrsjacksoncooks.wordpress.com/2011/01/05/spicy-baked-wedges/), and some corn on the cob (done in a very high tech way of sticking in the microwave!) or some coleslaw (recipe for which you can find here https://mrsjacksoncooks.wordpress.com/2011/03/19/healthy-vege-lunch-options-falafels-with-red-cabbage-salad/). You could even do some baked beans if you wanted…the colonel would be proud!

The recipe for the chicken comes from Ravinder Bhogal’s Cook in Boots recipe book which you can find here http://www.amazon.co.uk/Cook-Boots-Ravinder-Bhogal/dp/0007291175/ref=sr_1_1?ie=UTF8&qid=1320768392&sr=8-1 and is still my favourite recipe book of all time. She uses this recipe for chicken wings, but I prefer thighs and drumsticks. Just make sure you cook them properly (I usually stick them in the oven to keep warm for a few minutes once the wedges are done).

The recipe calls for whole spices, which I use – I’ve never used the ground ones and they do give a different taste, but if you don’t have the whole spices you could try ground coriander, cumin and some ground pepper instead. I expect it would work – it may just taste a little different.

What I like to do is get the wedges on early – do them before anything else as they take a good 30-40 minutes. Then whilst they’re doing I make the chicken coating, followed by the coleslaw. It’s perfect because the coleslaw needs about 15 minutes in the fridge once it’s made – which it gets, and then you’re ready to fry the chicken – and the wedges are then done at the same time as the chicken and you just get the coleslaw out the fridge. It’s all done in about 40-50 minutes tops.

Serve it all immediately in front of the tv and some comforting reality tv or a good movie and maybe even a bottle of wine. Perfect night in.

Mrs Jackson’s Fried Chicken

Serves 3

  • 4 tbsp cornflour
  • 2 tsp cumin seeds
  • 2 tsp coriander seeds
  • 2 tsp black peppercorns
  • 1/2 tsp ground cinnamon
  • 2 dried chillis, crumbled or crushed (or use chilli flakes)
  • 1/2 tsp salt
  • zest of 1 lemon
  • 3 garlic cloves, crushed
  • 3 chicken drumsticks
  • 3 chicken thighs
  • Lots of oil (vegetable, rapeseed, sunflower, groundnut etc) for deep frying
  1. Grind the whole spices (and chillis if you like) together to form a rough powder.
  2. Put the cornflour in a bowl with the dried spices, the lemon zest, garlic, chillis, salt and cinnamon and mix together well.
  3. Heat about 3-4 inches of oil in a wok or high sided frying pan.
  4. Coat the chicken all over in the flour & spice mix. shake off the excess.
  5. When the oil is very hot and smoking, drop the chicken into the oil – be careful it doesn’t spit at you. You may need to fry in batches – make sure you give enough room to the chicken pieces to cook properly.
  6. I usually cook the chicken for a good 5 minutes on each side – sometimes longer if they’re large pieces. Test they’re done with a knife or skewer and drain onto kitchen towel.
  7. Serve immediately with wedges, coleslaw, corn on the cob, baked beans – whatever you prefer – it’s finger lickin’ good!

20111108-042447 PM.jpg

Leave a comment »

Hangover comfort: Easy creamy vege pasta bake

20111107-110714 AM.jpg

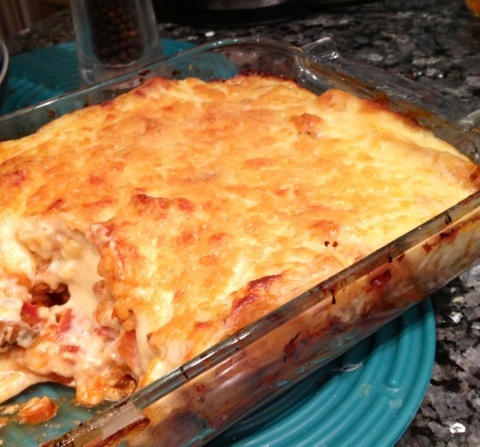
We’d been out with friends on Saturday night, and so yesterday, we were just moping about the house with hangovers. Unfortunately, we’re too old not to get hangovers! And we just wanted some comforting stodge to soak up some of the toxins. So I made a vege pasta bake. Mostly because I couldn’t bothered to defrost any meat. Plus we’d been out for a meal on Saturday night so eating less meat seemed like a good idea.

This is really easy, and is essentially like making vege lasagne but with pasta instead of lasagne sheets – and there’s no layering. My poor head couldn’t have coped with anything complicated in any case!

It would work as a quick and easy midweek meal too, and depending on what veges you put in, could be quite kiddy friendly too. I used carrots and mushrooms but really anything would work – peas, sweetcorn, peppers, celery…whatever you have in the fridge really.

It’s also relatively low in calories for a cheese and pasta fuelled dinner – 588 calories apparently. So if you’re on that party dress diet, this is a good dinner option – and you won’t feel like you’re dieting with this at all.

Creamy vege pasta bake

Serves 3

  • 200g pasta shapes
  • 1 tbsp oil
  • 1 onion, finely chopped
  • 2 carrots, diced
  • 200g chestnut mushrooms, sliced
  • 400g tin tomatoes
  • 1 tbsp tomato puree
  • 2 tsp of mixed herbs or assorted dried herbs (basil, oregano, thyme etc)
  • 1 tsp sugar
  • salt and pepper
  • 2 tbsp butter (or margerine)
  • 2 tbsp plain flour
  • 5-600ml milk
  • salt & pepper
  • 70g cheddar cheese, grated
  • 1 egg
  • 30g parmesan cheese, grated
  1. Preheat the oven to 200 degrees celsius
  2. Boil the pasta according to the packet instructions, drain and set aside
  3. In a saucepan or high sided frying pan, heat the oil on a medium heat. Add the onion and carrot and fry until softened.
  4. Add the mushrooms and continue to fry until the mushrooms brown.
  5. Then add the tin of tomatoes (and rinse out the tin with water and add the water to the pan) breaking them up with the spatula or spoon. Mix well.
  6. Cook for a minute before adding the puree, herbs and sugar. Stir well. Bring to the boil, then reduce to a simmer and cook until the veges are cooked through and you have a thick tomatoey sauce (about 15 minutes).
  7. Meanwhile, melt the butter in a separate saucepan. Then add the flour, mixing well to combine into a paste. Cook for a couple of minutes.
  8. Then gradually add the milk whisking constantly to remove lumps, until you have a thin sauce. Bring to the boil, and simmer until it thickens to the desired thickness (quite thick sauce). Add 2/3 of the cheddar to the sauce and mix well. Then add some salt and pepper to taste. Remove from the stove.
  9. When the tomato sauce is ready, add salt and pepper to taste before adding the drained pasta to the sauce and mix well to combine. Tip this into a baking dish.
  10. Beat the egg into the cheese sauce and pour over the pasta and tomato sauce.
  11. Sprinkle the remaining cheddar and the parmesan over the cheese sauce and put in the middle of the oven for about 20-30 minutes or until cooked through and the cheese is a golden brown.
  12. Serve immediately with garlic bread and feel your hangover subside 🙂
Leave a comment »